Panduan Dan Manual
- Panduan Log Masuk Pertama Kali
- Mencipta Halaman Baru Frontend Site
- BEST PRACTICE FOR CODING
- Patching guide
- Patching DRSA
- Xampp installation
- Deployment Plan and rollback
- SKM Code Changes
- SIT TESTING LOGIN PAGE
- User Migration Prod Go Live
- Kerberos Setting Request
Panduan Log Masuk Pertama Kali
Panduan Log Masuk Pertama Kali
Untuk log masuk kedalam sistem E-booking buat pertama kalinya sila ikuti langkah di bawah
-
Sila gunakan No. Kad Pengenalan anda sebagai Id Pengguna.
-
Sila gunakan No. Gaji anda sebagai kata laluan.
-
Tukar dan kemaskini kata laluan kepada katalaluan yang lebih selamat.
Mencipta Halaman Baru Frontend Site
Mencipta Halaman (Page) Baru
Halaman (Page)
BEST PRACTICE FOR CODING
Best Practice For CSP Coding Guide
Avoid "Unsafe Inline" (CSS)
Dont do this ❌
Avoid inline styling.
<div class="wrapper" style="overflow:hidden;background: #ffffff; ">
Do this ✔
Either separate the css on other file then include it using link, or use style tag with nonce
## on php editor
echo <<<HTML
<style nonce="'.$nonce.'">
    .wrapper-1 {
        overflow:hidden;background: #ffffff;
    }
</style>
<div class="wrapper wrapper-1" >
HTML
;


## on html editor
<style nonce="{{nonce}}">
    .wrapper-1 {
        overflow:hidden;background: #ffffff;
    }
</style>
<div class="wrapper wrapper-1" >
Avoid "Unsafe Inline" (javascript)
Dont do this ❌
Avoid inline script.
<script>
       $(window).on("load", function() {}());
</script>
Do this ✔
Either separate the script on other file then include the script, or use script tag with nonce
## on php editor
echo
<<<SCRIPT
<script nonce="'.$nonce.'">
       $(window).on("load", function() {}());
</script>
SCRIPT
;

## on html editor
<script nonce="{{nonce}}">
       $(window).on("load", function() {}());
</script>
Patching guide
App Patching
Step
- login to the server
- extract the content to root dir (C:\caddy\html) (use application like 7z for windows to extract).
DB Patching
Step
- login to server
- open terminal,
- cd to mysql bin directory
cd "C:\Program Files\MySQL\MySQL Server 8.0\bin"
- login to the mysql server using (the password in C:\ in text file mysql_pass.txt)
mysql.exe -u root -p
- drop the existing database
DROP DATABASE ukas;
- create the database
CREATE DATABASE ukas;
- logout from mysql server
exit
- import the new sql
mysql -u root -p ukas < path_to_sql_file.sql
Patching DRSA
Patching DRSA
Langkah-langkah yang dilaksanakan untuk patching
- Backup terlebih dahulu database server sedia ada (10.29.217.31)
mysqldump -u root -p mampu > mampu-20250702.sql
- Drop table berkaitan frontend
mysql -u root -p
DROP TABLE frontend_content
DROP TABLE frontend_content_assign
DROP TABLE frontend_page
- Import semula SQL dari server dev (frontend.sql)
mysql -u root -p mampu < frontend.sql
-
Adjust setting NGINX untuk mengeluarkan nonce-requestid header server-app (10.29.217.162)
4.1 Edit file conf
vim /etc/nginx/drsa.conf4.2 Masukan code add header
proxy_set_header X-Request-ID $request_id;

add_header Content-Security-Policy "default-src 'self'; script-src 'self' 'nonce-$request_id'; style-src 'self' 'nonce-$request_id';";
Contoh:
server {
listen 80;
server_name example.com;

location / {

    # Add CSP header with nonce
    proxy_set_header X-Request-ID $request_id;

    add_header Content-Security-Policy "default-src 'self'; script-src 'self' 'nonce-$request_id'; style-src 'self' 'nonce-$request_id';";
        # Other configurations...
        root /var/www/html;
        index index.html;
    }
}
4.5 Restart nginx
sudo service restart nginx -
Panggil nonce dari php
<?php
$nonce = $_SERVER['HTTP_X_REQUEST_ID'];
?>
<script nonce="<?php echo $nonce; ?>">
    console.log('Script with nonce');
</script>
Xampp installation
XAMPP Apache SSL Certificate Installation Manual for Windows Server
Table of Contents
- Prerequisites
- Certificate Preparation
- XAMPP Configuration
- Virtual Host Setup
- Testing and Verification
- Troubleshooting
Prerequisites
Before starting, ensure you have:
- XAMPP installed on Windows Server
- Administrative privileges on the server
- SSL certificate files (
.crt,.key, and optionally.ca-bundleor intermediate certificates) - Domain name pointing to your server's IP address
Certificate Preparation
Step 1: Organize Certificate Files
Create a dedicated folder for your SSL certificates:
C:\xampp\apache\conf\ssl\
Place your certificate files in this directory:
-
your-domain.crt(SSL certificate) -
your-domain.key(Private key) -
intermediate.crt(Intermediate/Chain certificate - if provided)
Step 2: Verify Certificate Files
Ensure your certificate files are in the correct format:
-
Certificate file: Should start with
-----BEGIN CERTIFICATE----- -
Private key: Should start with
-----BEGIN PRIVATE KEY-----or-----BEGIN RSA PRIVATE KEY-----
XAMPP Configuration
Step 3: Enable SSL Module
- Open XAMPP Control Panel as Administrator
- Stop Apache if it's running
- Navigate to
C:\xampp\apache\conf\httpd.conf - Find and uncomment (remove
#) the following line:Include conf/extra/httpd-ssl.conf - Also ensure the SSL module is loaded by uncommenting:
LoadModule ssl_module modules/mod_ssl.so
Step 4: Configure SSL Settings
- Open
C:\xampp\apache\conf\extra\httpd-ssl.conf - Locate the default SSL virtual host section (usually starts around line 104)
- Comment out or modify the default SSL virtual host to avoid conflicts
Virtual Host Setup
Step 5: Create Virtual Host Configuration
-
Open
C:\xampp\apache\conf\extra\httpd-vhosts.conf -
Add your HTTP virtual host (port 80):
<VirtualHost brspace.bankrakyat.com.my:80> ServerAdmin dev@dev.com DocumentRoot "C:/xampp/htdocs/brspace/www" ServerName brspace.bankrakyat.com.my ServerAlias brspace.bankrakyat.com.my ErrorLog "logs/brspace.local-error.log" CustomLog "logs/brspace.local-access.log" common DirectoryIndex index.php RewriteEngine On RewriteCond %{HTTPS} off RewriteRule ^ https://%{HTTP_HOST}%{REQUEST_URI} <Directory "C:/xampp/htdocs/htdocs/brspace/www"> AllowOverride all Options FollowSymLinks MultiViews Require all granted </Directory> </VirtualHost> -
Add your HTTPS virtual host (port 443):
 <VirtualHost brspace.bankrakyat.com.my:443>
 ServerAdmin dev@dev.com
 DocumentRoot "C:/xampp/htdocs/brspace/www"
 ServerName brspace.bankrakyat.com.my
 ServerAlias brspace.bankrakyat.com.my
 ErrorLog "logs/brspacessl.local-error.log"
 CustomLog "logs/brspacessl.local-access.log" common
 DirectoryIndex index.php

 <Directory "C:/xampp/htdocs/htdocs/brspace/www">
     AllowOverride all
     Options FollowSymLinks MultiViews
     Require all granted
 </Directory>

 # SSL Engine Switch:
 SSLEngine on
 SSLCertificateFile C:\xampp\apache\conf\ssl\bundle.brspace.bankrakyat.com.my.crt
 SSLCertificateKeyFile C:\xampp\apache\conf\ssl\new.brspace.bankrakyat.com.my.key

 </VirtualHost>
Step 6: Enable Virtual Hosts
- Open
C:\xampp\apache\conf\httpd.conf - Find and uncomment:
Include conf/extra/httpd-vhosts.conf
Step 7: Enable Rewrite Module (for HTTP to HTTPS redirect)
In C:\xampp\apache\conf\httpd.conf, uncomment:
LoadModule rewrite_module modules/mod_rewrite.so
Testing and Verification
Step 8: Test Configuration
- Open Command Prompt as Administrator
- Navigate to
C:\xampp\apache\bin\ - Test Apache configuration:
You should see "Syntax OK"httpd.exe -t
Step 9: Restart Apache
- In XAMPP Control Panel, start Apache
- Check for any error messages in the control panel
Step 10: Verify SSL Certificate
- Open your browser and navigate to
https://brspace.bankrakyat.com.my - Check that:
- The site loads without SSL warnings
- The padlock icon appears in the address bar
- HTTP automatically redirects to HTTPS
Step 11: Online SSL Testing
Use online tools to verify your SSL installation:
- SSL Labs SSL Test:
https://www.ssllabs.com/ssltest/ - SSL Checker: Various online SSL checker tools
Troubleshooting
Common Issues and Solutions
Issue 1: "Cannot load SSL certificate"
Solution:
- Verify file paths in virtual host configuration
- Ensure certificate files have proper permissions
- Check that certificate files are not corrupted
Issue 2: "SSL handshake failed"
Solution:
- Verify that port 443 is open in Windows Firewall
- Check that no other service is using port 443
- Ensure SSL module is properly loaded
Issue 3: "Certificate chain incomplete"
Solution:
- Add intermediate certificate using
SSLCertificateChainFile - Ensure intermediate certificate is in the correct order
Issue 4: Mixed content warnings
Solution:
- Update all internal links to use HTTPS
- Check for hardcoded HTTP resources in your website
Log File Locations
- Apache Error Log:
C:\xampp\apache\logs\error.log - Custom Error Logs:
C:\xampp\apache\logs\your-domain-ssl-error.log - Custom Access Logs:
C:\xampp\apache\logs\your-domain-ssl-access.log
Useful Commands
# Test Apache configuration
C:\xampp\apache\bin\httpd.exe -t

# View loaded modules
C:\xampp\apache\bin\httpd.exe -M

# Check SSL certificate details
openssl x509 -in your-domain.crt -text -noout
Security Best Practices
- Keep certificates secure: Store certificate files in a protected directory
- Regular updates: Keep XAMPP and Apache updated
- Strong SSL configuration: Use modern protocols and ciphers only
- HSTS headers: Implement HTTP Strict Transport Security
- Regular certificate renewal: Monitor certificate expiration dates
- Backup certificates: Keep secure backups of your certificate files
This manual provides a complete guide for setting up SSL certificates with virtual hosts on XAMPP Apache in a Windows Server environment. Follow each step carefully and test thoroughly before deploying to production.
Deployment Plan and rollback
SSL Certificate Deployment and Rollback Plan for XAMPP Apache
Document Information
- Version: 1.0
- Date: August 26, 2025
- Environment: Windows Server with XAMPP Apache
- Prepared by: System Administrator
DEPLOYMENT PLAN
1. Pre-Deployment Checklist
1.1 Environment Verification
- Verify XAMPP version and Apache status
- Confirm administrative access to Windows Server
- Ensure domain DNS is properly configured
- Verify current website functionality
- Check available disk space (minimum 100MB free)
- Confirm network connectivity and firewall settings
1.2 Certificate Validation
- Verify SSL certificate files are present and valid
- Check certificate expiration date (should be > 30 days)
- Validate private key matches the certificate
- Confirm intermediate/chain certificates are available
- Test certificate files with OpenSSL (if available)
1.3 Backup Preparation
- Create backup directory:
C:\xampp\backups\ssl-deployment-YYYYMMDD - Backup current Apache configuration files
- Backup current website files
- Document current Apache service status
- Take system snapshot (if virtualized)
2. Deployment Schedule
2.1 Recommended Deployment Window
- Primary Window: Sunday 02:00 AM - 06:00 AM (Local Server Time)
- Alternative Window: During scheduled maintenance window
- Duration Estimate: 2-3 hours (including testing)
- Team Required: 1-2 System Administrators
2.2 Pre-Deployment Communication
- Notify stakeholders 48 hours before deployment
- Send maintenance window notification to users
- Prepare status page updates
- Coordinate with DNS provider if needed
3. Deployment Steps
Phase 1: Preparation (30 minutes)
Start Time: T+0
Duration: 30 minutes
Step 1.1: Create Backup
# Create backup directory
mkdir C:\xampp\backups\ssl-deployment-%date:~-4,4%%date:~-10,2%%date:~-7,2%

# Backup configuration files
copy "C:\xampp\apache\conf\httpd.conf" "C:\xampp\backups\ssl-deployment-%date:~-4,4%%date:~-10,2%%date:~-7,2%\"
copy "C:\xampp\apache\conf\extra\httpd-vhosts.conf" "C:\xampp\backups\ssl-deployment-%date:~-4,4%%date:~-10,2%%date:~-7,2%\"
copy "C:\xampp\apache\conf\extra\httpd-ssl.conf" "C:\xampp\backups\ssl-deployment-%date:~-4,4%%date:~-10,2%%date:~-7,2%\"

# Backup htdocs if needed
robocopy "C:\xampp\htdocs" "C:\xampp\backups\ssl-deployment-%date:~-4,4%%date:~-10,2%%date:~-7,2%\htdocs" /MIR
Step 1.2: Document Current State
- Record current Apache version:
httpd.exe -v - Document loaded modules:
httpd.exe -M - Test current website functionality
- Record current port bindings:
netstat -an | findstr :80
Phase 2: SSL Configuration (45 minutes)
Start Time: T+30
Duration: 45 minutes
Step 2.1: Certificate Installation
- Create SSL directory:
mkdir C:\xampp\apache\conf\ssl - Copy certificate files to SSL directory
- Set appropriate file permissions
- Verify certificate file integrity
Step 2.2: Apache Configuration
- Enable SSL module in
httpd.conf - Configure SSL settings in
httpd-ssl.conf - Update virtual hosts in
httpd-vhosts.conf - Enable rewrite module for redirects
Step 2.3: Configuration Validation
# Test Apache configuration
C:\xampp\apache\bin\httpd.exe -t
Expected Result: Syntax OK
Phase 3: Service Restart and Testing (45 minutes)
Start Time: T+75
Duration: 45 minutes
Step 3.1: Service Management
- Stop Apache service gracefully
- Wait 30 seconds for complete shutdown
- Start Apache service
- Verify service is running without errors
- Check Apache error logs for any issues
Step 3.2: Basic Functionality Testing
- Test HTTP access (should redirect to HTTPS)
- Test HTTPS access with SSL certificate
- Verify certificate chain is complete
- Test website functionality over HTTPS
- Check browser security indicators
Phase 4: Comprehensive Testing (30 minutes)
Start Time: T+120
Duration: 30 minutes
Step 4.1: SSL Certificate Verification
- Browser certificate validation
- SSL Labs test (if internet accessible)
- Certificate expiration date verification
- Mixed content checking
Step 4.2: Performance and Security Testing
- Page load time comparison
- Security headers verification
- HSTS functionality test
- Cross-browser compatibility check
4. Post-Deployment Tasks
4.1 Monitoring Setup
- Configure SSL certificate expiration monitoring
- Set up log monitoring for SSL errors
- Update monitoring dashboards
- Schedule regular SSL health checks
4.2 Documentation Update
- Update system documentation
- Record SSL certificate details and expiration
- Update network diagrams
- Create maintenance schedules
4.3 Communication
- Send deployment success notification
- Update status pages
- Notify stakeholders of completion
- Schedule post-deployment review
ROLLBACK PLAN
1. Rollback Triggers
1.1 Critical Issues Requiring Immediate Rollback
- SSL certificate validation failures
- Website completely inaccessible via HTTPS
- Apache service failing to start
- Significant performance degradation (>50% slower)
- Critical functionality broken
1.2 Non-Critical Issues (Monitor and Fix)
- Minor SSL warnings in some browsers
- Non-critical mixed content warnings
- Minor performance impact (<20% slower)
- Cosmetic SSL indicator issues
2. Rollback Decision Matrix
| Issue Severity | Impact Level | Action Required | Time Frame |
|---|---|---|---|
| Critical | High | Immediate Rollback | 15 minutes |
| Major | Medium | Rollback within 1 hour | 60 minutes |
| Minor | Low | Monitor and schedule fix | Next maintenance |
3. Rollback Procedures
Quick Rollback (Emergency - 15 minutes)
Step 1: Stop Apache Service
# Stop Apache immediately
net stop apache2.4
# or via XAMPP Control Panel
Step 2: Restore Configuration Files
# Restore backup configurations
copy "C:\xampp\backups\ssl-deployment-YYYYMMDD\httpd.conf" "C:\xampp\apache\conf\"
copy "C:\xampp\backups\ssl-deployment-YYYYMMDD\httpd-vhosts.conf" "C:\xampp\apache\conf\extra\"
copy "C:\xampp\backups\ssl-deployment-YYYYMMDD\httpd-ssl.conf" "C:\xampp\apache\conf\extra\"
Step 3: Start Apache Service
# Test configuration
C:\xampp\apache\bin\httpd.exe -t

# Start Apache service
net start apache2.4
Full Rollback (Comprehensive - 45 minutes)
Step 1: Complete Service Shutdown
- Stop Apache service
- Terminate any remaining Apache processes
- Clear any temporary files
Step 2: Full Configuration Restore
- Restore all Apache configuration files
- Remove SSL certificate files
- Restore original virtual host configurations
- Restore original htdocs if modified
Step 3: Verification and Testing
- Test Apache configuration syntax
- Start Apache service
- Verify HTTP website functionality
- Test all critical website features
- Monitor error logs for 15 minutes
4. Rollback Verification Checklist
4.1 Service Level Checks
- Apache service is running
- Website accessible via HTTP
- All website functionality working
- No errors in Apache error logs
- Performance metrics restored to baseline
4.2 Business Continuity Checks
- Critical business functions operational
- User access restored
- Database connectivity confirmed
- External integrations working
5. Post-Rollback Activities
5.1 Immediate Actions (0-2 hours)
- Document rollback reason and timeline
- Notify stakeholders of rollback completion
- Update status pages
- Begin root cause analysis
5.2 Follow-up Actions (2-24 hours)
- Complete incident report
- Schedule post-mortem meeting
- Plan remediation strategy
- Update deployment procedures if needed
5.3 Recovery Planning (24-72 hours)
- Analyze failed deployment
- Correct identified issues
- Plan new deployment approach
- Schedule retry deployment
RISK ASSESSMENT
1. Risk Matrix
| Risk | Probability | Impact | Mitigation Strategy |
|---|---|---|---|
| Certificate validation failure | Medium | High | Thorough pre-deployment testing |
| Apache configuration error | Low | High | Configuration backup and testing |
| DNS propagation issues | Low | Medium | Verify DNS before deployment |
| Performance degradation | Medium | Medium | Load testing and monitoring |
| User access interruption | Medium | High | Deployment during low-usage hours |
2. Contingency Plans
2.1 Certificate Issues
- Keep old certificate as backup
- Have certificate authority contact information ready
- Prepare temporary self-signed certificate if needed
2.2 Configuration Issues
- Maintain multiple backup copies
- Have Apache expert on standby
- Prepare minimal working configuration
2.3 Service Interruption
- Implement health checks during deployment
- Have alternative access methods ready
- Prepare user communication templates
SKM Code Changes
EONLINE
mpCustomer.master

- 1ine 219 - 225
mpCustomer.master.vb

- line 3 - 4
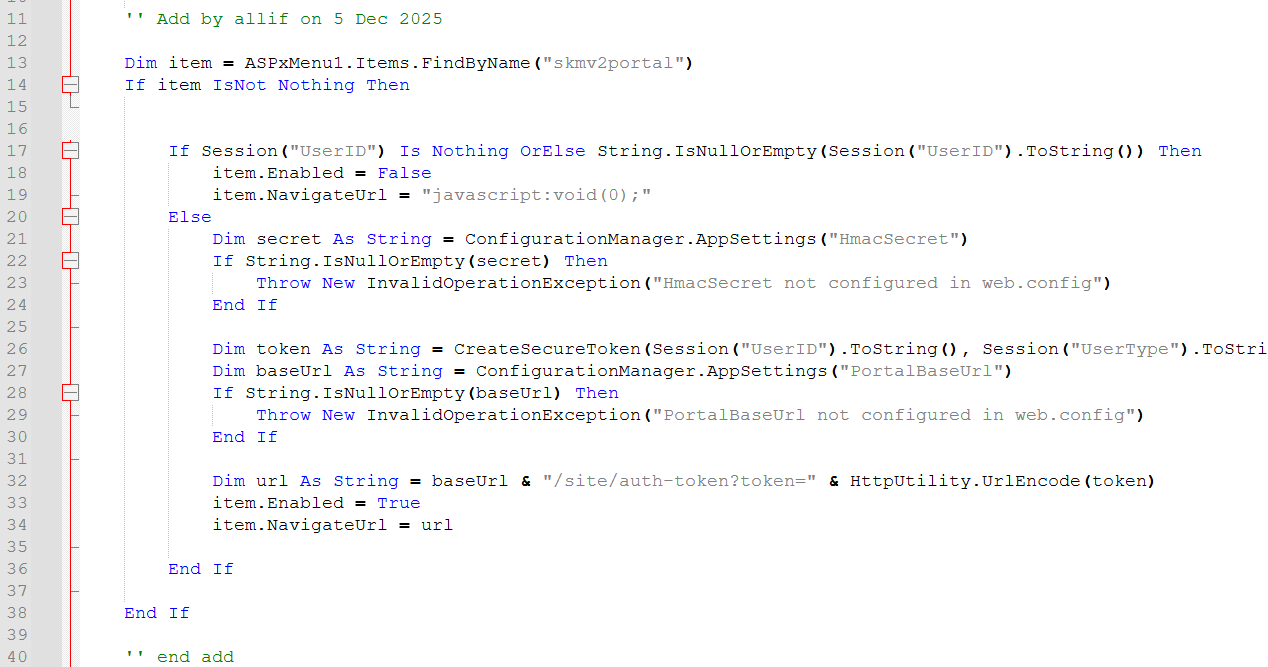
- line 11 - 40
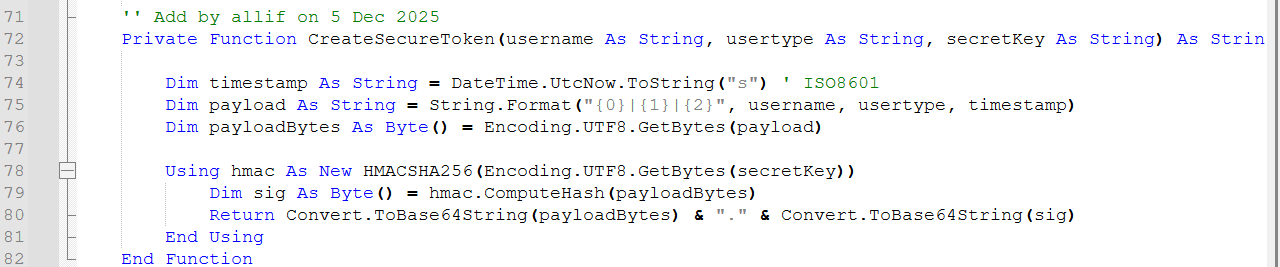
- line 71- 82
web.config

- line 28-29 // for base url, change to production url/domain
INFOKOP
defaultDark

l. 1ine 274 - 277
defaultDark.vb

- line 4
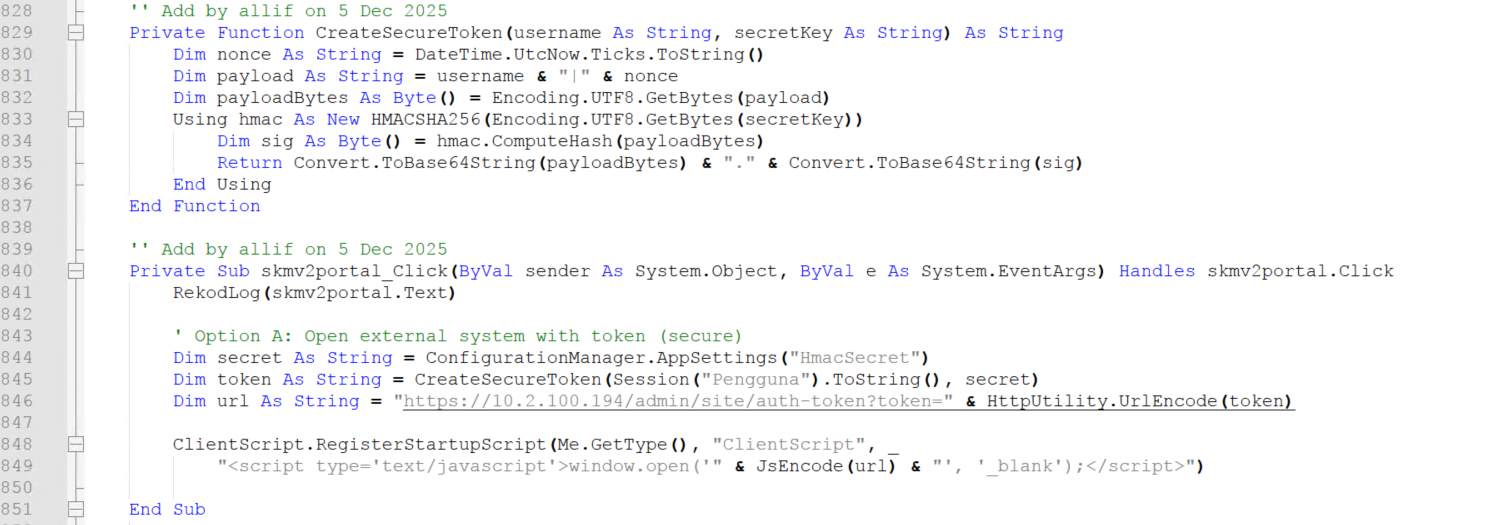
- line 828 - 851
- line 846 - // change the url to live/prod [https://10.2.100.194] to production url

- line 853 - 856
web.config

- line 170
SIT TESTING LOGIN PAGE
Infokop
- Open browser goto url 10.2.100.211'
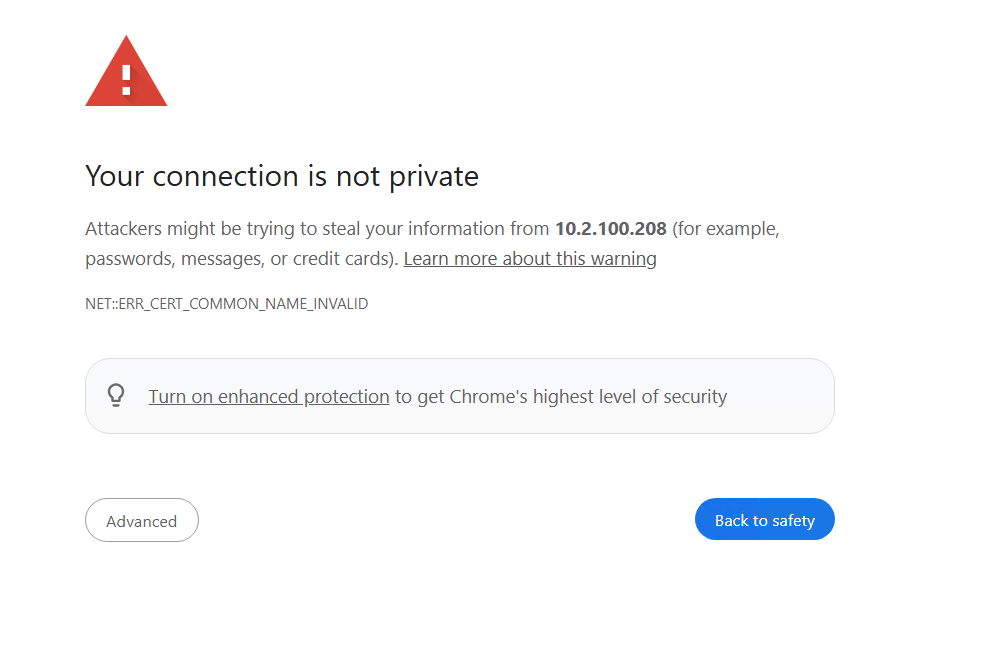 2. if greet with unsecured, just click advance / procceed
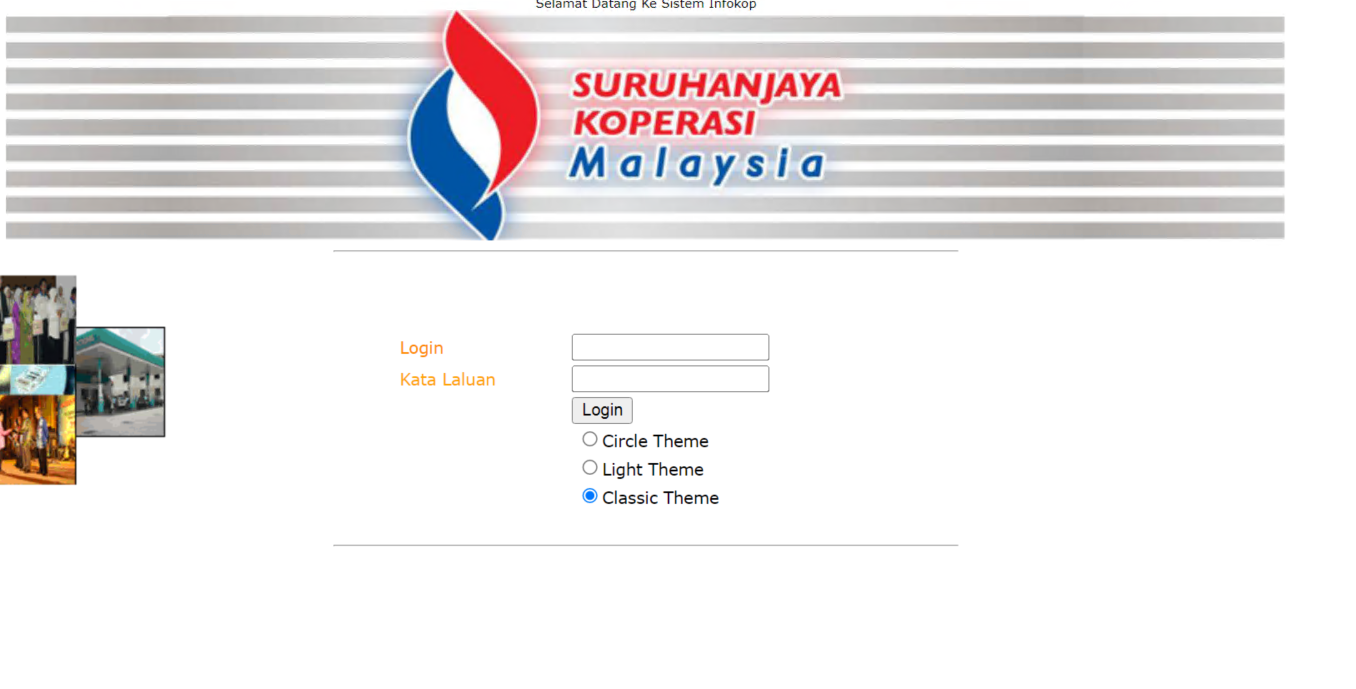 3. fill the cred user:demo password: Demo$kM123
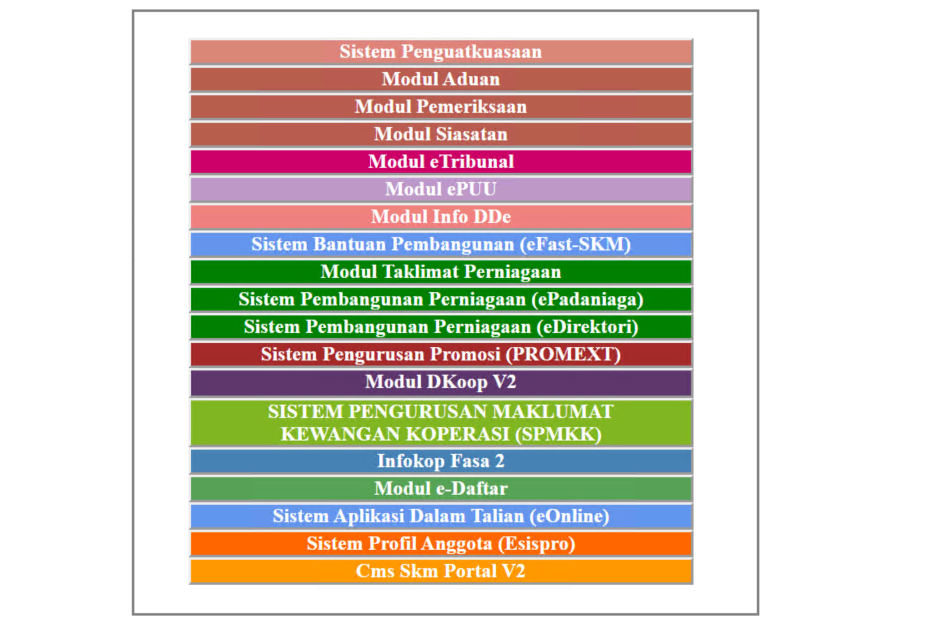 4. klik on menu "cms skm portalv2"
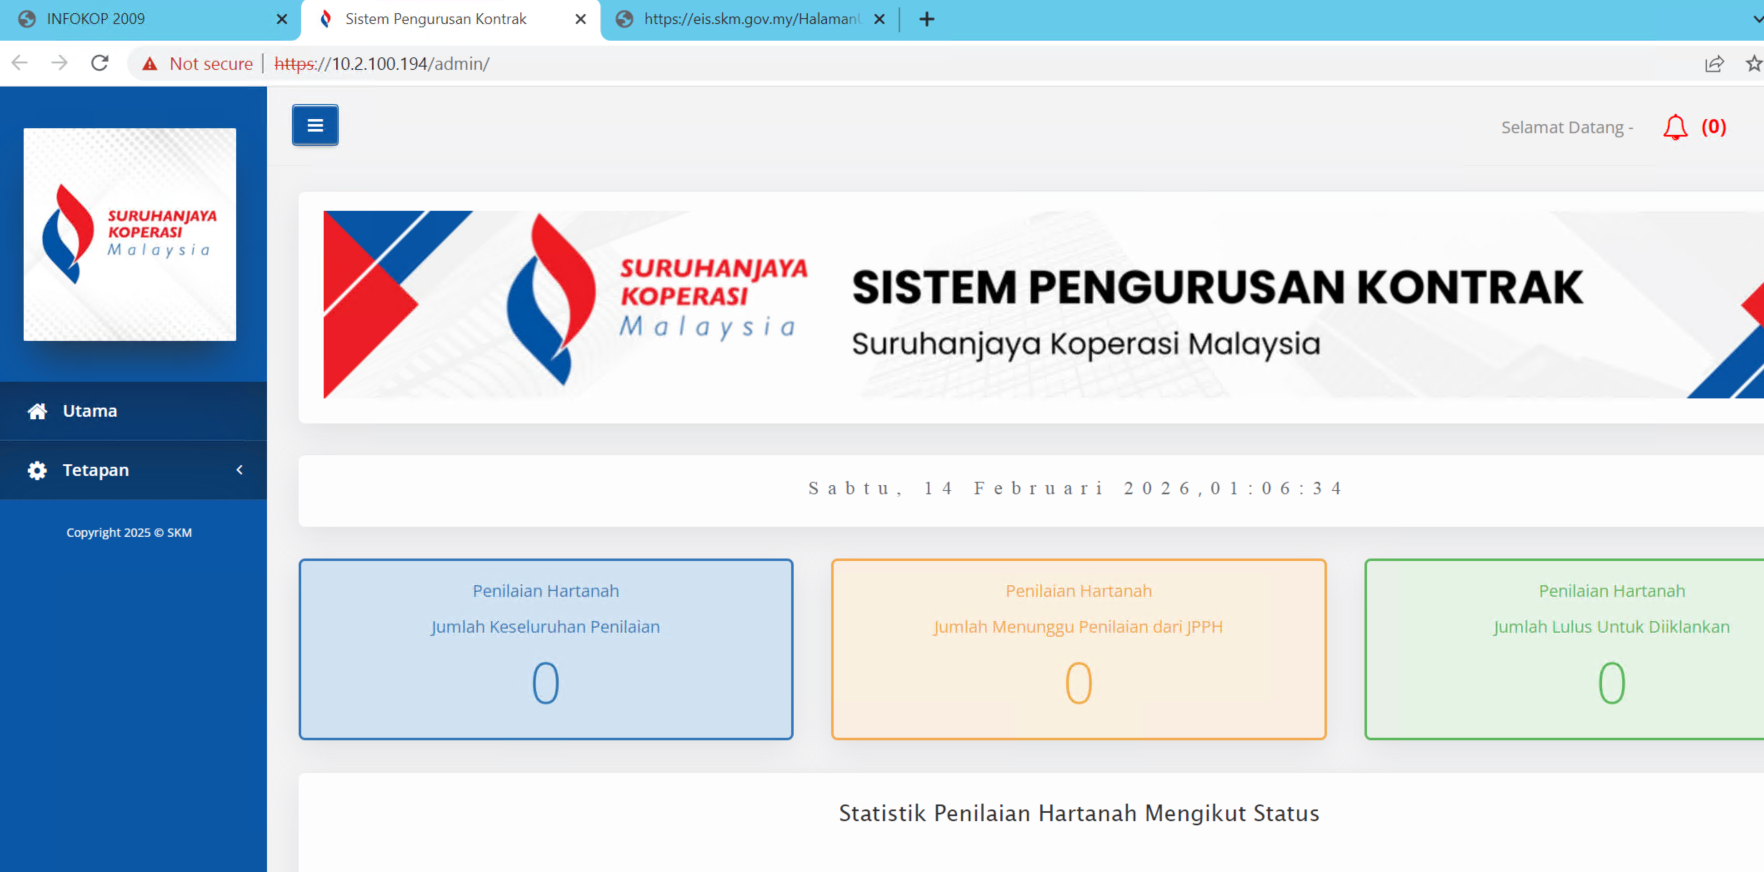 5. you will be redirected to page dashboard cms skm
Eonline
- Open browser goto url 10.2.100.208
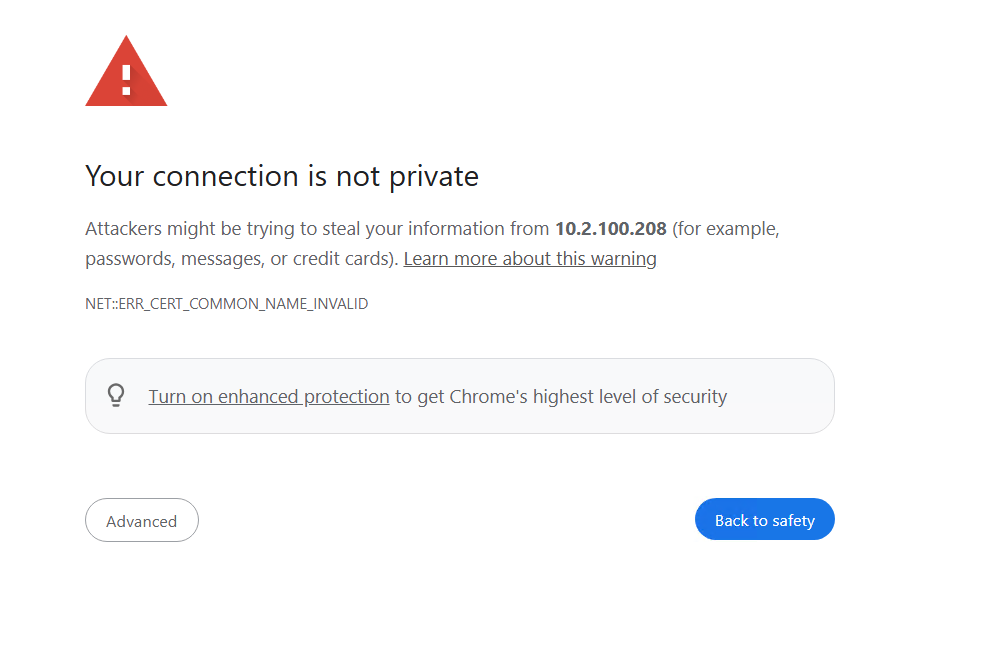 2. if greet with unsecured, just click advance / procceed
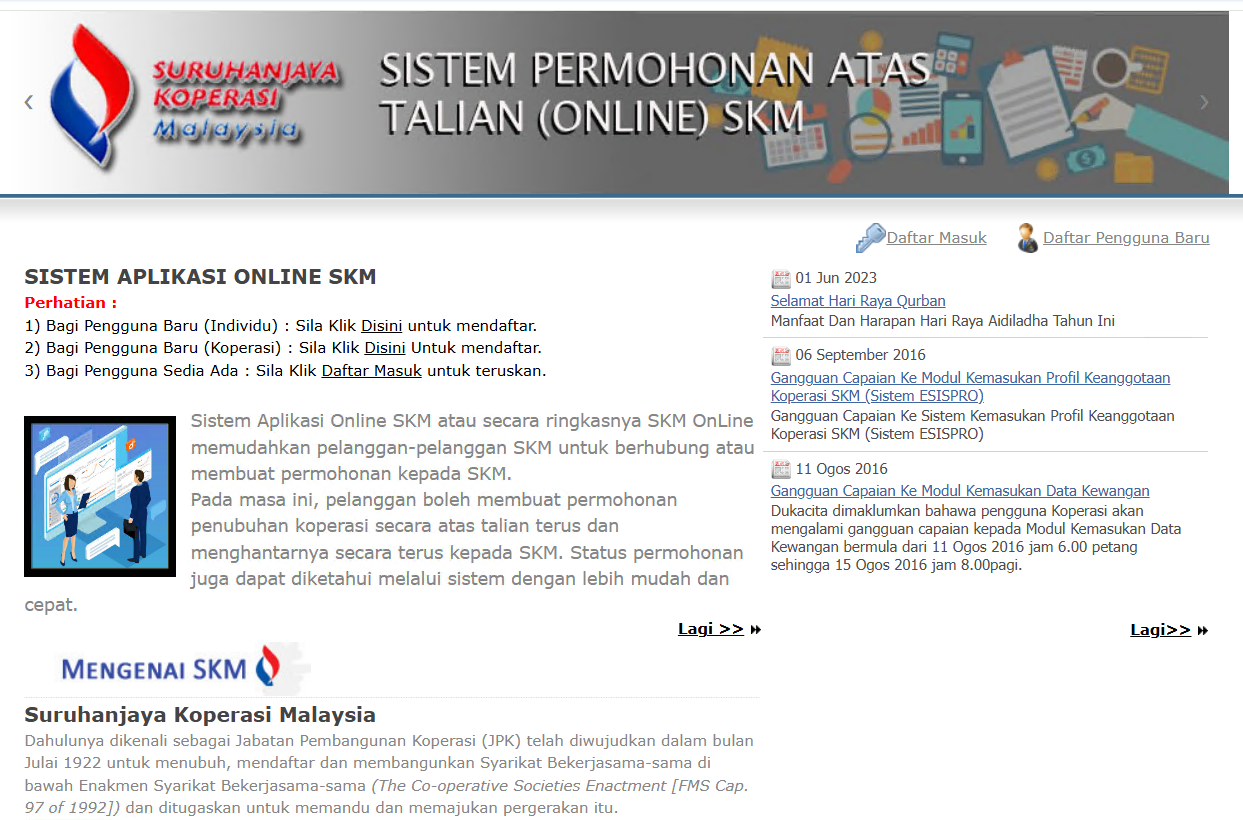
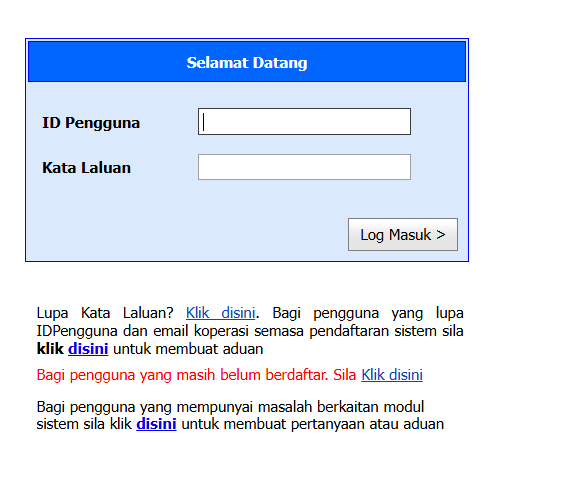
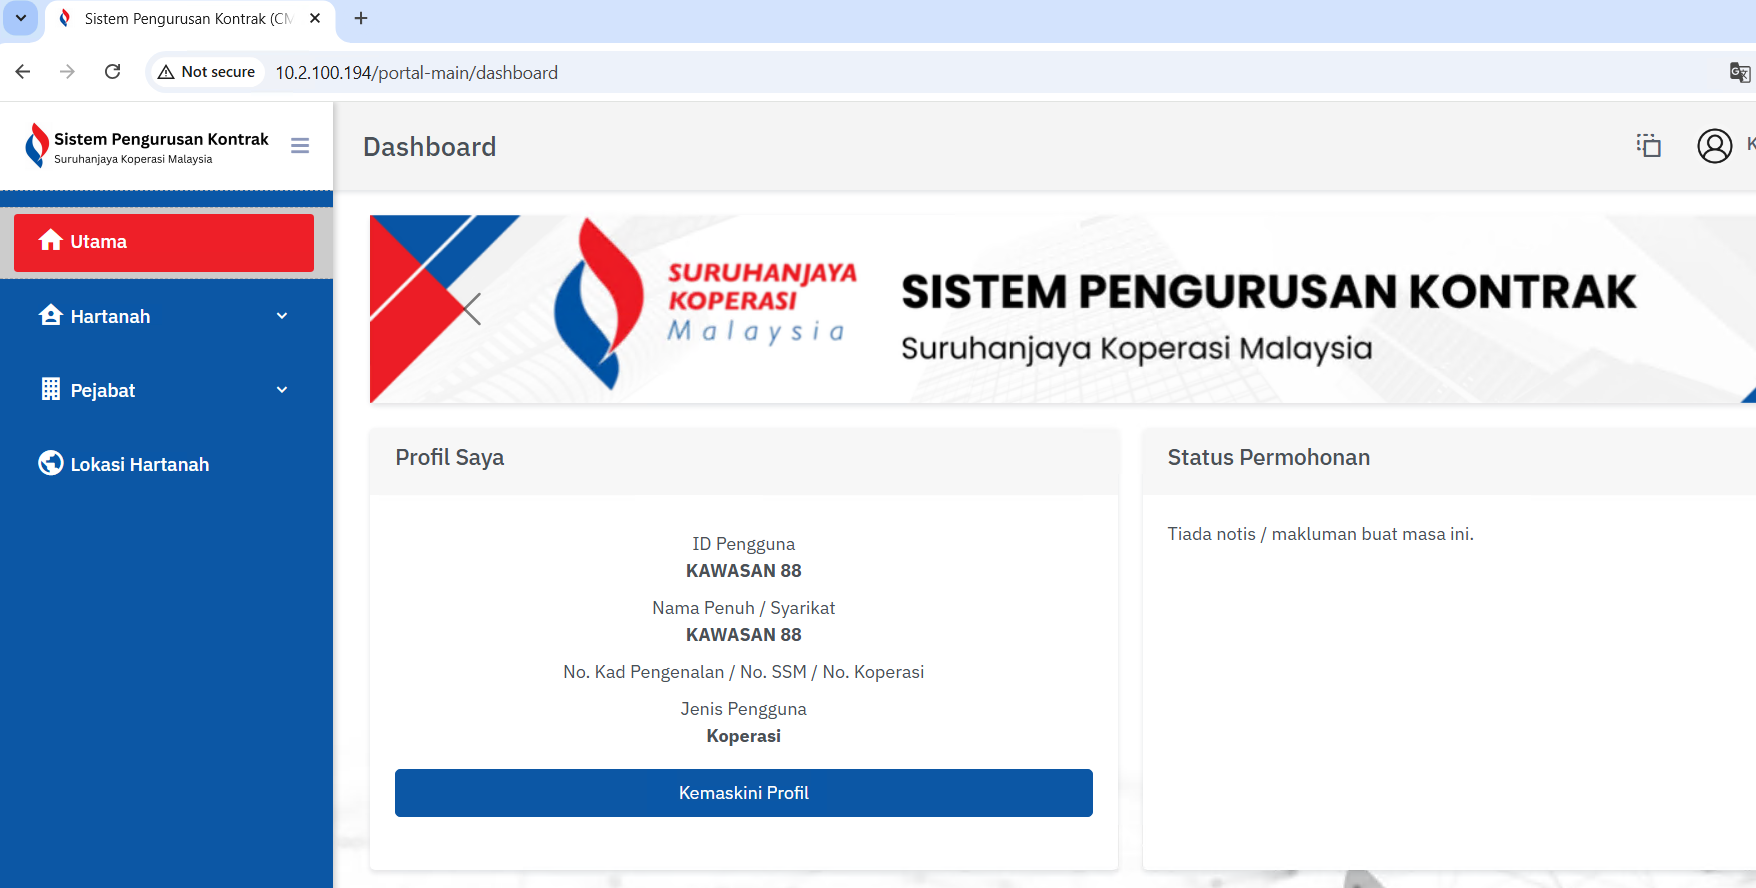
- click on daftar masuk -> fill the cred user:kawasan 88, note: user kawasan with space, password: Demo$kM123

- klik on menu "portalv2 skm"

- you will be redirected to page dashboard cms skm

User Migration Prod Go Live
- Login psql
sudo -u postgres psql
- Renambe to back if exist
ALTER DATABASE rtvm RENAME TO rtvm_backup_1;
Remove SET transaction_timeout line
sed -i '/SET transaction_timeout/d' kkr-rtvmdb-202601300827.sql
Remove LOCALE_PROVIDER clause from CREATE DATABASE
sed -i 's/LOCALE_PROVIDER = [^ ]* //' kkr-rtvmdb-202601300827.sql
Kerberos Setting Request
I'm requesting assistance to enable seamless Windows Authentication (password-less login) for an internal IIS-hosted PHP application. To support both Kerberos and NTLM fallback, we need the following:
Requested Actions:
-
Create a dedicated domain service account
- Suggested name:
svc_iis_[appname] - Standard user privileges
- "Log on as a service" right
- Suggested name:
-
Assign this account as the Identity for IIS Application Pool:
[DefaultAppPool]on server[BRUATEMOHONAPP (10.1.101.89)] -
Register SPNs to the new account:
-
HTTP/eformuat.bankrakyat.com.my -
HTTP/eformuat
-
-
Deploy a GPO to all domain-joined workstations for automatic credential delegation:
- Policy:
AuthServerWhitelist - Value:
*.bankrakyat.com.my,eformuat.bankrakyat.com.my,eformuat
- Policy:
This configuration ensures reliable Single Sign-On using Kerberos when available, with NTLM as a secure fallback. No manual registry changes or per-PC configuration will be required for end users.
Once implemented, I will validate end-to-end authentication and confirm successful user resolution in the application. Please let me know if you prefer a specific naming convention or need additional details.
Thank you for your support.